Wednesday, October 17, 2012

Quilling Flowers - Wild Tomato

A Little Bit of  Imagination and A Different Flower
 
My next flower is Wild Tomato with is blue flowers and green leaves will perfectly compliment my Red Flower.This design is also from the book "A Guide to Quilling Flowers by Helen Walter". This is a book I would love to own and would reccomend for anybody who wants to start to Quill, especially flowers.

     Part                   Quantity                  Length                  Shape                Colour

  • Flowers              20                       1cm                     Tight Coil         Yellow
                                      20                      15cm                    Eye                    Blue

  • Stem                   2                         8cm                     Strip                  Green
                               2                         3cm                     Strip                  Green        
  • Leaves                11                       20cm                   Tear Drop         Green


                                       2                          15cm                  Tear Drop         Green

Intense Yellow Stamen and the Blue Eye Petals

  1. Each Flower is made of Five Yellow Tight Coil in the Centre, surrounded by five Blue Eyes. 
  2. Arrange flowers and glue them in desired position.
  3. Add Stem.
  4. Glue in the leaves.
We can Play with the formation and brancing of flowers to give a fullness to the Wall Art


Wednesday, October 10, 2012

Quilling Beautiful Flowers - Hairy Leschenaultia

The Quilled Strips of Paper make this a 3- Dimentional Masterpiece.


Your Inmagination can Work Wonders
 with these flowers
My Trip to Chennai during summer made me visit the local craft store and they had a lot of Quilling paper on display and suddely I took a keen interest in Quilling as it required patience and the end result was delicate and beautiful. I made a few simple earrings with it. When I came to Camp Hill, PA I stumbled upon a array of books in the local "Fredrickson Library, Camp Hill,PA" . My Interest was kindles and thought why not make a wall art of quilled flowers.

This design is from the book "A Guide to Quilling Flowers by Helen Walter". This book has some wonderful designs which can be worked in an afternoon when the kids are sleeping and make a beautiful wall art/card. This flower is Hairy Leschenaultia  an Australian Native Flower and blooms in a myriad of colours from the palest to the deepest of blues, creamy whites, vivis scarlet, bright cromson, soft pinks, sunny yellows and blazing orange. Some are bicoloured. I choose this as it would accentuate the white walls with reds.


Part                                 Quantity             Length             Shape                          Colour

  • Flowers                           24                    20cm             Arrow                           Red
                                                 6                      10cm             Bent Teardrop              Pink
 
  • Stem                              1                      8cm             Strip                               Green 
                                           1                      6cm             Strip                               Green      
  •  
  •                                         2                      5cm             Strip                               Green
  •                                         1                      3cm             Strip                               Green
  •                                         2                      1cm             Strip                               Green

  • Leaves                            5                     15cm            Tear Drop                       Green  
  1. Each Flower is made of Four Red Arrows, arranged with points touching in the centre. One arrow is upright and the remaining fan out beloe. The Bent Pink Teaddrop is glued on to the Centre. It can alos be glued such that the bent end to the centre of the flower and the fat end just juts out.
  2. Arrange flowers and glue them in desired position.
  3. Add Stem.
  4. Glue in the leaves.

Wednesday, September 26, 2012

Fresh Moist Raspberry Cake

The golden crusted Moist Soft Raspberry Cake
We went Berry Picking this Fall and came home laden with delicious freshly picked Balckberries and Raspberries and the outcome of the fresh berries is the just out of the oven light and airy sweet scented moist Fresh Rashberry Cake. The cake has a nice crust on it from the sugar and was a real winner with my family

I picked the receipe from http://www.kitchenbounty.com/2011/04/fresh-raspberry-cake.html and followed his buttermilk variation which made it light and less in calorie.

The Batter with the Raspberries
Ingredients:

•All Purpose Flour: 1 cup
•Salt: 0.25 tsp
•Baking Soda/ Soda Bicarbonate : 0.5 tsp
•Baking Powder: 0.5 tsp
•Butter Softened : 0.5 cups - 4 tbs - 0.5 stick
• Sugar : 2/3 cup + 2-3 tbs to sprinkle on the top
•Eggs : 1
•Vanilla essence - 0.5 tsp
•Buttermilk- 0.5 cup
•Fresh or Frozen Raspberries - 1 cup


Procedure:

•Preheat the oven to 400F . Line and grease a cake pan or tin that is 18cm/7 in square.Dust it with All Purpose flour.

•Sift together 1 cup of plain/all-purpose flour, 0.25 tsp salt, 0.5 tsp bicarbonate of soda/baking soda, 0.5 tsp baking powder.

•In a food processor, cream 0.5 cups softened butter until soft and fluffy and slowly add the sugar until well mixed Add the vanilla  and the  egg. Finally add the Buttermilk and mix well.

•Mix the dry Ingredients to the wet mixtures in small batches until combined.

•Pour the batter into the cake pan and level the top and add the raspberries to it. Sprinkle with sugar.

•Bake in the middle rack for about 25-30 minutes till the knife comes out clean. Cool before inverting the cake.

•Can be served with whipped cream


The Cake filled with Raspberries

Wednesday, September 12, 2012

Fabric Painting on a Saree

Pinks.. Greens.. Yellows
 
 
Having finished 2 Salwar Embroidery for my friends I got to do Painting on a Saree for another friend of mine. It was a Kota Saree with Applique border in Pastel Pink ,  Pastel Green and a bright Yellow.. I was asked to add a punch of colour and design and make it flamboyant. As the applique was a floral design I went for a floral motif of a Bunch of Flowers.
 
 
The Applique Border of the Saree

I used  2 shades of Pearl Pink, Pearl green with a mix of Sap Green of Fevicryl Fabric on the Floral Design. I didn't use a medium to thin out the paint as Kota Fabric byitself is a very thin fabric and the colour bleeds if it is thin and watery.  I had placed the flower motif a regular intervals and accentuated the Saree.

The Bunch and Single Flowers Alternate eachother.

 A part of the bunch was added as Single flower motif to further make it more beautiful and also in the Pallu.

The Play of Colours


Thursday, September 6, 2012

Beads in Embroidery

THE NECKLINE
Yet again lots had happened. I have moved back to US- Camp Hill, PA and am trying to find my roots here. Am Yet to establish my craft table and my crafty things but I have quite a lot of my past work which I can showcase. !!!!


THE FLOWER MOTIFS DETAILED WITH BEADS

A LITTLE MORE DETAIL WITH LAISY DAISY STITCH


In Continuation of the Surprise Embroidery, Painting I took up commercially for friends and family I was asked to accentuate an already printed Kameez. As it already carried a design I had less choice to work with. It was beige dull colour with marron and green circle and leaf motif. I went for beads of thr same colour but it overall added a shine under light and green and pink thread which would show off in the otherwise dull colour of the kameez. I worked on the existing design and created a neck line and at the base. Also worked with Laisy Daisy (Individual Chain Stitch) at the Border and the Sleeves She liked it immensely Hope to do manymore of this kind till I start my Work as a Architect designing spaces.
THE NECKLINE AND THE BEADWORK AT THE BOTTOM

A SERIES OF DIAMONDS ARE WORKED WITH BEADS


Monday, June 25, 2012

Embroider Little Flowers

Bright Yellow Flowers and Green Stems on a Half White Kameez

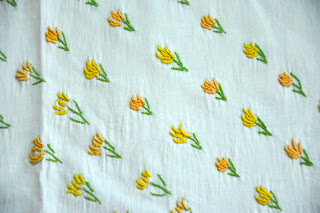
I love whites and beiges as it can be teamed up with any  colour duppata and salwars. This one I had teamed with Parrot Green Churidhar and Duppata but still the Kameez lacked something. I thought I'll add some small flowers to it . The basic design was inspired from kurta featured in Needle N Thread Magazine sporting a similar neck Pattern. I went to work with bright yellow flowers in Button Hole stich( which we use as loops for hooks) and Parrot green Stems in Stem stitch. I worked around the neck and the lower side of the kurta and in the end it looked chic to wear.

White Kurtha teamed with Parrot green Churidhar and Duppata
The design follows the Neckline


Monday, June 18, 2012

Pot Painting - As a Teacher

The Simple Pot Turned into a pretty work of art by a 8year old.
This Summer Hols the scroching sun made many kids stay indoors for the most of the afternoon and I was able to put best use of my skills to teach them a few crafst. We made stick puppets, seed art, vegetable painting, diya painting, recycled collage bags to store toys and so on with the 4year olds.

The Little older kids tried their hands on Pot Painting and decorating, Stain Glass Painting. This is a pot made by my neighbours kid with a little guidance from me. It made me immensely happy to see some of my skills to be made use. My friends even encourage me to start a summer camp/class next year with all sorts of crafts. But all my thanks goes to my daughter who just supports me in all my art and enjoys every single thing I do and in her sweet innocent way appreciates all my work by
flaunting it to all her friends and their family.


A little touch of ribbon to add to its beauty

Materials Needed:
 
 
  • Acrylic Paint
  • Pot - any Shape , Size
  • All purpose Varnish
  • Yelllow/ white carbon
  • Beads, sequince, embellishments if needed.
  • Glue
  • Sand papper

  • Scrub the pot well with a Sand Papper and make it smooth. Immerse the pot for about 2 hours in water so as it doesn't soak much paint while painting. Dry the pot for abput an hour and a half. Choose a sarker base acolur and give 2 coats of it let it dry. Once it is dry draw the design or carbon a design of your choice. Paint or glue the embellishments to make it pretty.

    Monday, June 11, 2012

    Stained Glass Painting as a Teacher

    Summer is the time we have fun and with my daughter's birthday  I got busy and was not able to blog for quite some time. During the Summer Hols I tried my hands on quite a few crafts. I found felt t be versatile and did a Finger Puppet themed Birthday for my Daughter.. did some embroidery, Fabric Painting on Sarees, some earrings, Felt Purses and quite a lot of Quilling a new craft for me!!!.

    The Best was I was able to teach my neighbours kids some Stained Glass Painting.. These are some of the works of my Friends Kids aged about 8-9years and their hand on Stained glass Paintings


    Bird on a Branch on a Spring Morning
     
    Materials Needed:

  • Glass Any Size
  • Watee Based Stain glass paints for beginers.
  • Stain Glass Liner
  • Tape to wind around the glass so as the hands are not cut
  • Interesting Designs
  • Butterfly on Hibiscus

    Lighthouse
    Voila with a little help these kids turned the palin glass into beautiful art to adorn their room walls.

    Thursday, April 5, 2012

    Recycle Bag

    In my childhood I used to save and cherish paper/ cardboard bag. One day when I was rummagging  through my junk collection as I call it I found one bag being torn. Voila look what was inside the colurful wrapping - a Kellogs carton.

    Any Carton never goes a waste!!!
    So now I recyle Kellogs and other cartons and make colourful bags to store my daughters toys, for her shopping, etc. and also gift them to her friends.

    Wednesday, March 28, 2012

    Hand Made Felt Bag

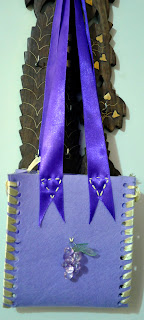
    CUTE FELT BAG
     This is a Do It Yourself Fancy Bag using Felt Cloth. I found a A4 (21cm x 29.7cm) felt cloth in the New Arts & Caft shop  "Itsy Bitsy" - http://itsybitsy.in/ and thought why not make a bag my daughter and got a purple felt cloth.


    Cut 14cm x 29.7cm from the A4 size. Cut the remaining piece into 2 halves for 7cm x 14.65cm and use if for the side panels. Punch holes on both sides  along the length and also on both sides along the lenght of the 2 halves.  Fold the 14cm x 29.7cm into half and make a crease. Attach the side panel to the side and stitch them together using a 1/4" satin ribbon of a contrast colour or a darker or lighter shade. I used a beige rinnon contrasting thr purple felt. For the handle I used a 1" satin ribbon and stiched it to the bag. I made a decorative pattern suning the ribbon and the thread using for stitch. We can put any Embelishment on the front and back tnd decorate the bag to our taste. I have played with the colours and ribbons and stitches to create a style.
    Now the  cute little Bag is ready to Use!!!!

    Wednesday, March 21, 2012

    My First Commercial Hand Embroidery


    PLAY OF COLOURS
    It has been an year since I had blogged and lots have happened in the past year. To highlight a few - I have moved back to Bangalore and my Kid is going to finish her preschool. I had done quite a few french beaded flowers, bags, embroidery on dress, wall art embroidery, handmade cards and some do it yourself toys for my kid and her friends which I plan to blog in the coming weeks and last but not the least had travelled quite a lot.


    THE MANGO AND VINE
     
     The surprise came this year in the form of a friend who had seen my embroidery and had told her friend about it. I was asked to embroider a plain white kameez. This is the first time I ventured out comercially.


    THE WHITE KAMEEZ
    I choose a Mango on the vine motif for this dress. I just love mangos as it can be used in many variations. This design I picked from emblibrary.com - Keep it Simple. As the Kameez was white in colour I had a wide choice of colours and went for pinks and yellow which compliment each other. I positioned 3 Mango- Vine Motif on the lower portion and a part of the motif in the neck.

    I worked with satin stitch on the mango in yellow colour and outlined it with dark pink chain stitch. The outer mango was in pink seed beads. The smaller flower parts were worked in shades of pink satin stitch. The circles inside the mango sandwitched between the pink coulours was in yellow satin
    stitch. The vine was worked in yellow pink multishade tube beads.
     
    THE NECK LINE
    The Hand and Neck are worked in Pink Chain Stitch and Yellow Pink Multishade Tube Beads. The person just loved the work! Hope to do manymore of this kind till I start my Work.